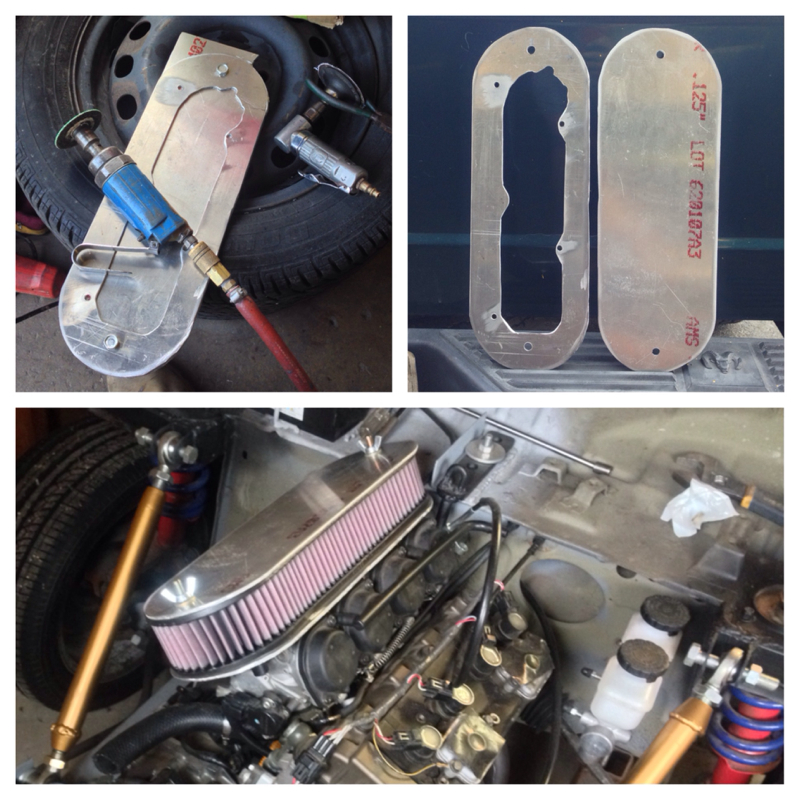
Made the top plate, got the required hardware and installed it on the intake. Still needs to be cleaned up, but I'm pretty happy with how it turned out
|
Made the top plate, got the required hardware and installed it on the intake. Still needs to be cleaned up, but I'm pretty happy with how it turned out
2 Comments
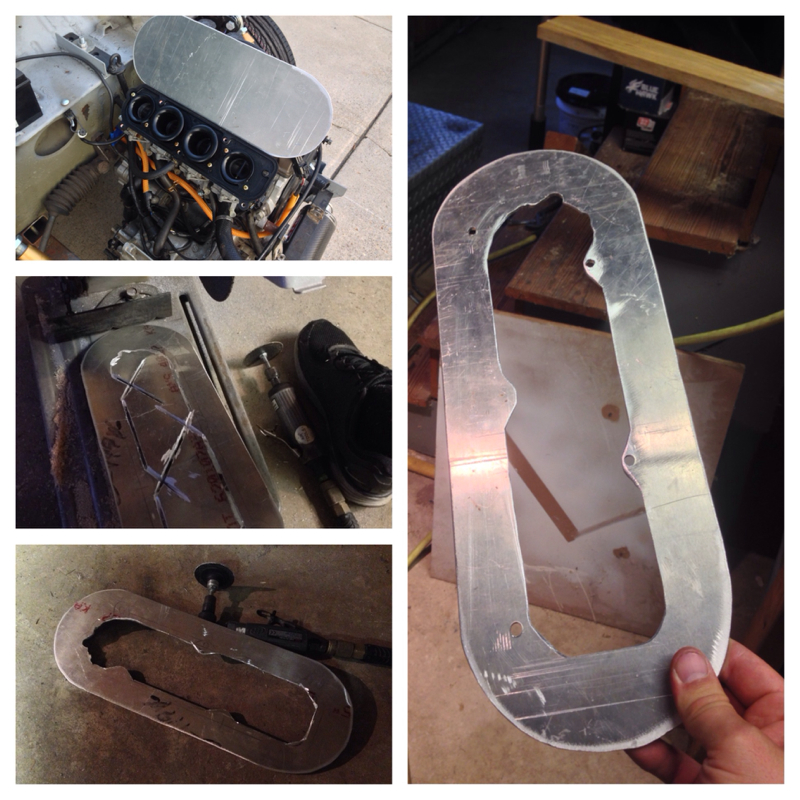
Picked up some 1/8" plate aluminum to make a intake adapter 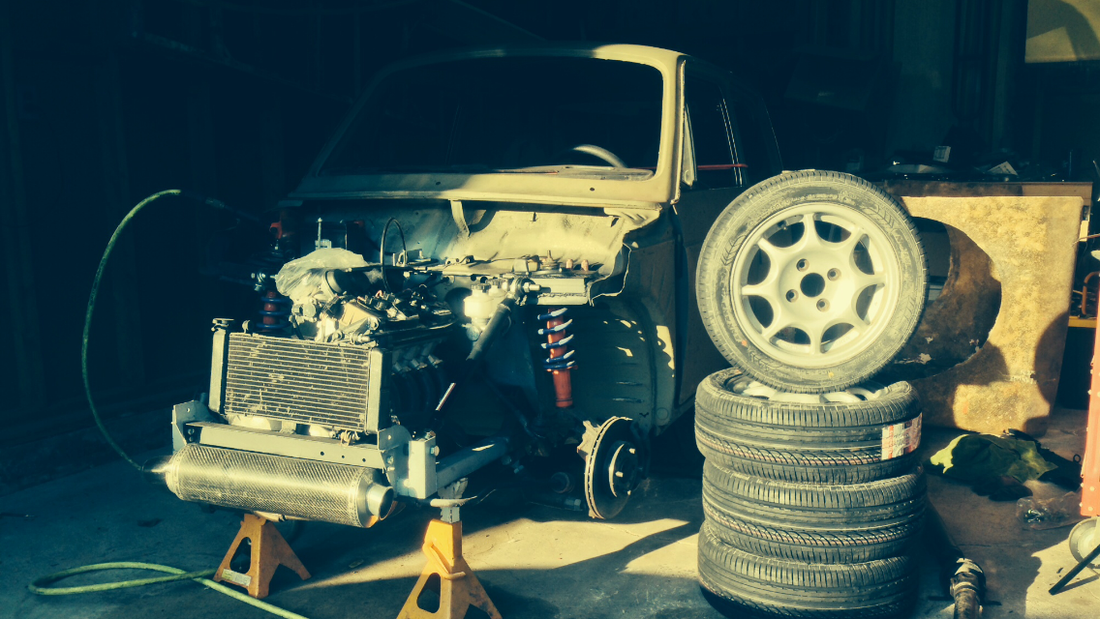
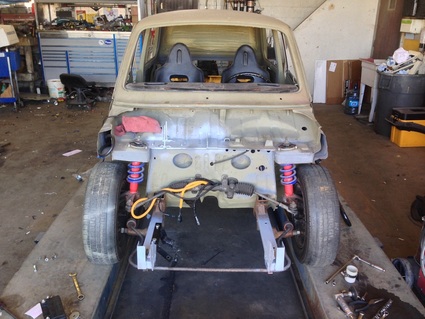
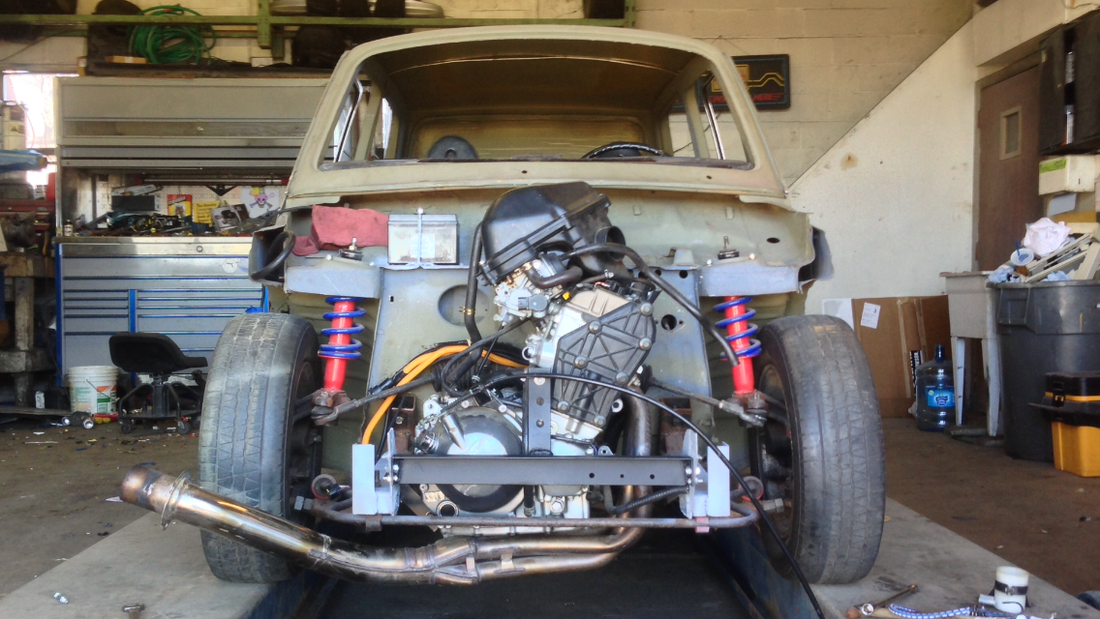
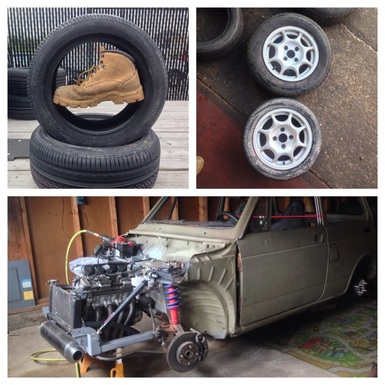 It's pretty difficult to find any 13" tire with less than a 75% sidewall in the US, but they are out there. The onse I decided on (largely due to their cheap price tag) were the Nanking AS-1's, which come in an unbelievably small 175/50/13. I called around a few places for a quote on mounting/balancing, but they were all ridiculously expensive. Luckily, there is a repair shop near where I work that has a tire machine, and the owner was nice enough to let me use it :) Thanks Scott! With the front, I was a little worried that the oil pan would be too close to the ground, but it's only about 3/4' lower, and if I need to I can always raise the car up a bit with the coilovers I have sitting on the shelf in my garage. The rear definitely will be lowered. There's no issue of anything hitting back there and honestly, it just looks a little awkward with how it sits now. All in all, I'm very happy with the fit, just needs a few tweaks. 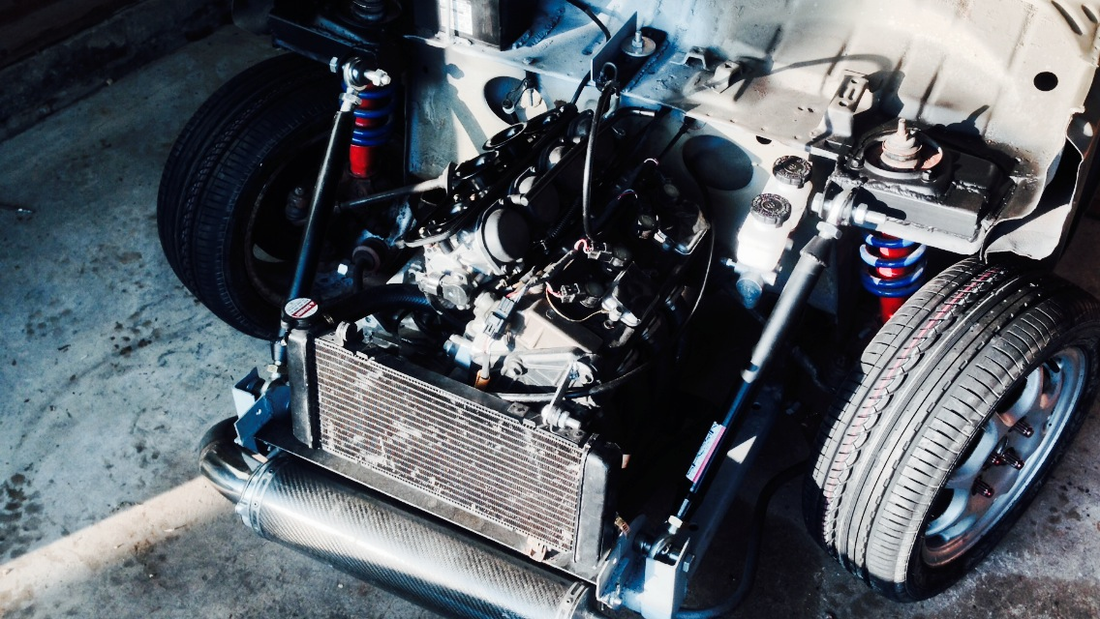
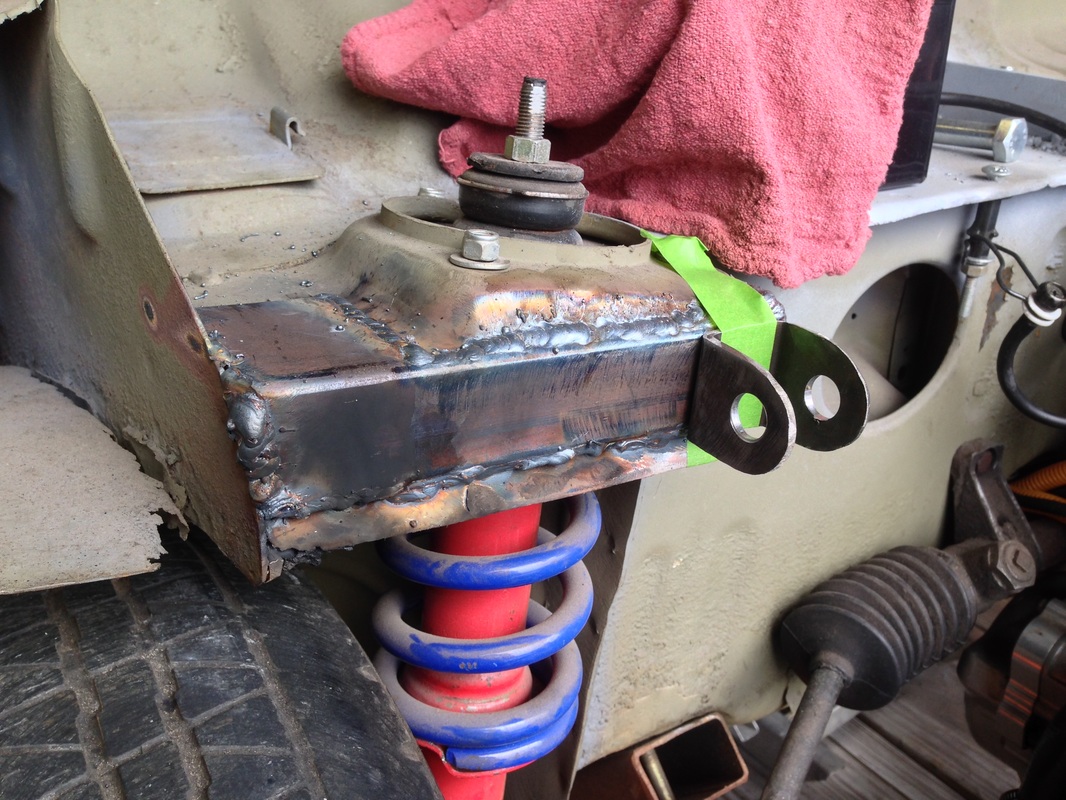
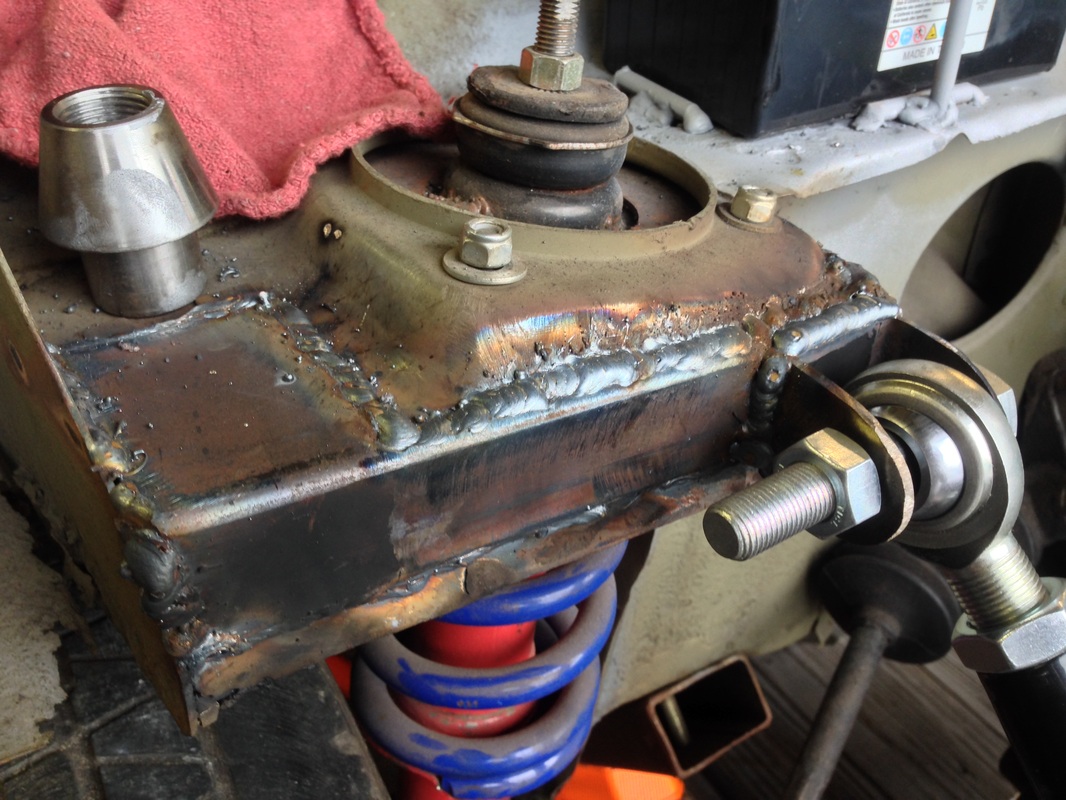
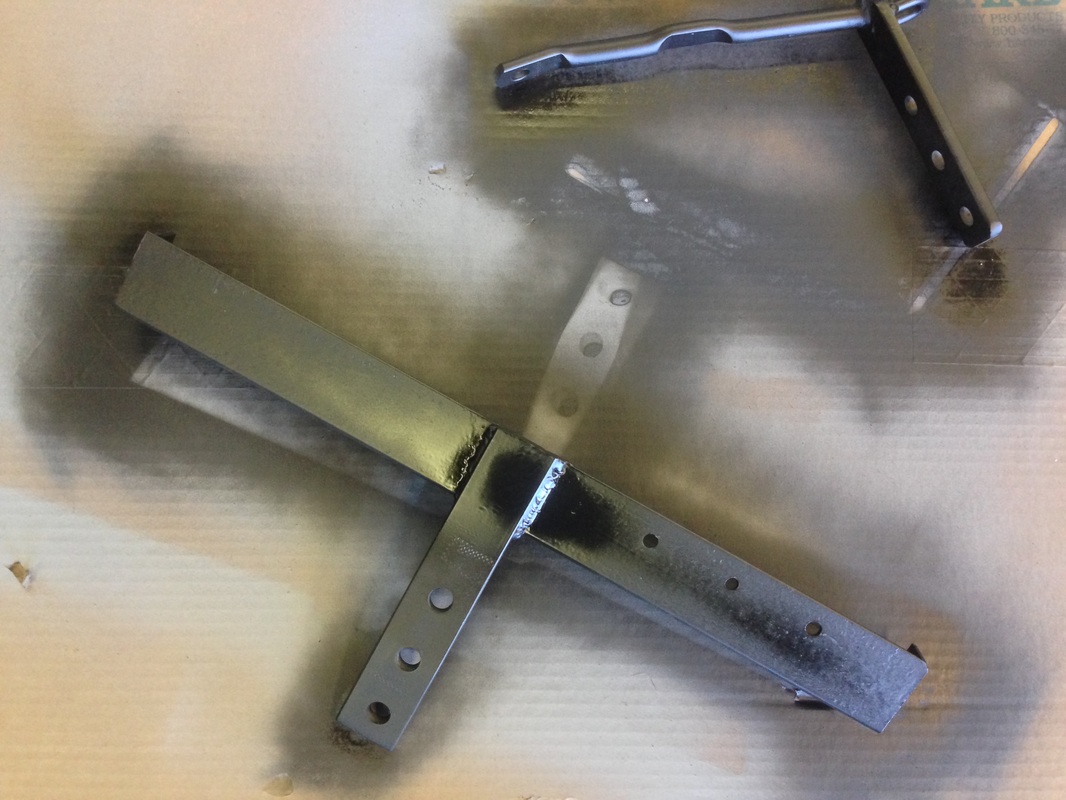
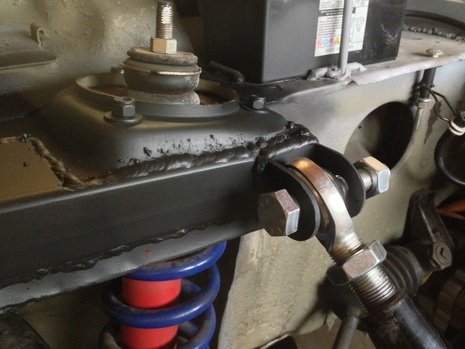 I had been wanting to do this since the original subframe was cut. I bought 2 forward and 2 reverse thread heim joints on amazon in order to make 2 adjustable tension rods to take some of the weight/force off the connection between the body and the subframe, while also increasing general rigidity.
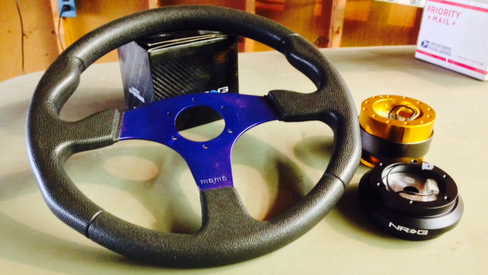 The original wheel was pretty flimsy, and also had a good size crack right in the middle that liked to snag your fingers. I Found a good deal on an NRG 6 bolt adapter for older Hondas, NRG quick release, and a bare bones purple MOMO steering wheel used. I'm still trying to decide what color to paint the wheel, but for now its just going on. 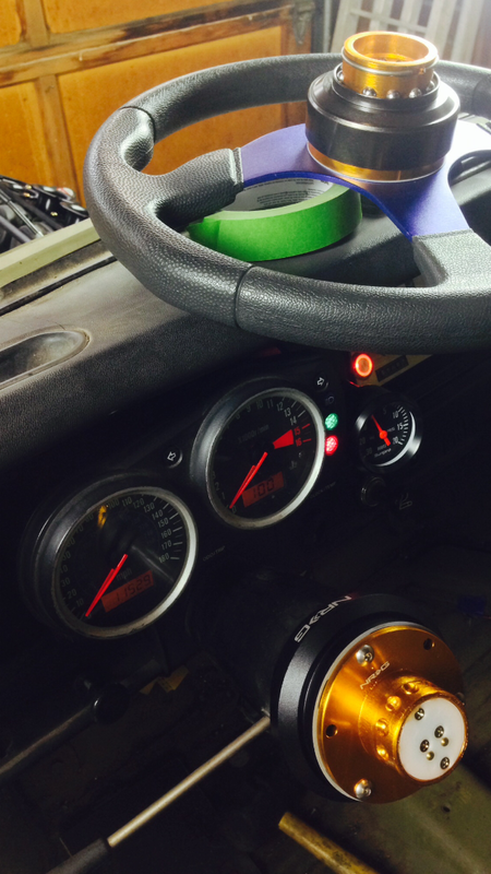 I'm pretty happy with how it all went together. I also took this opportunity to install a basic sunpro vacuum gauge right next to the tachometer.
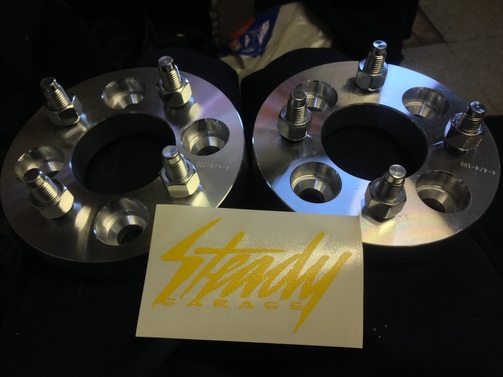 This was really a long time coming. In order to run the same wheels on all 4 corners we needed these adapters that go from the 4x101.6 bolt pattern of the MG Midget rear to the 4x100 bolt pattern of the 13" Honda alloy wheels we have. It will also bump the wheels out another inch and should look good with the smaller sidewall tires I'm planning on ordering.
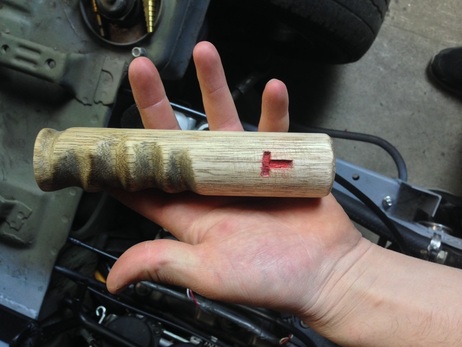 I was doing some other woodworking projects earlier in the week, and got a little itch to do custom shift knob... well.. its not really a knob, but you get the idea. Feels pretty solid in the hand and should work nicely for the sequential shifter.
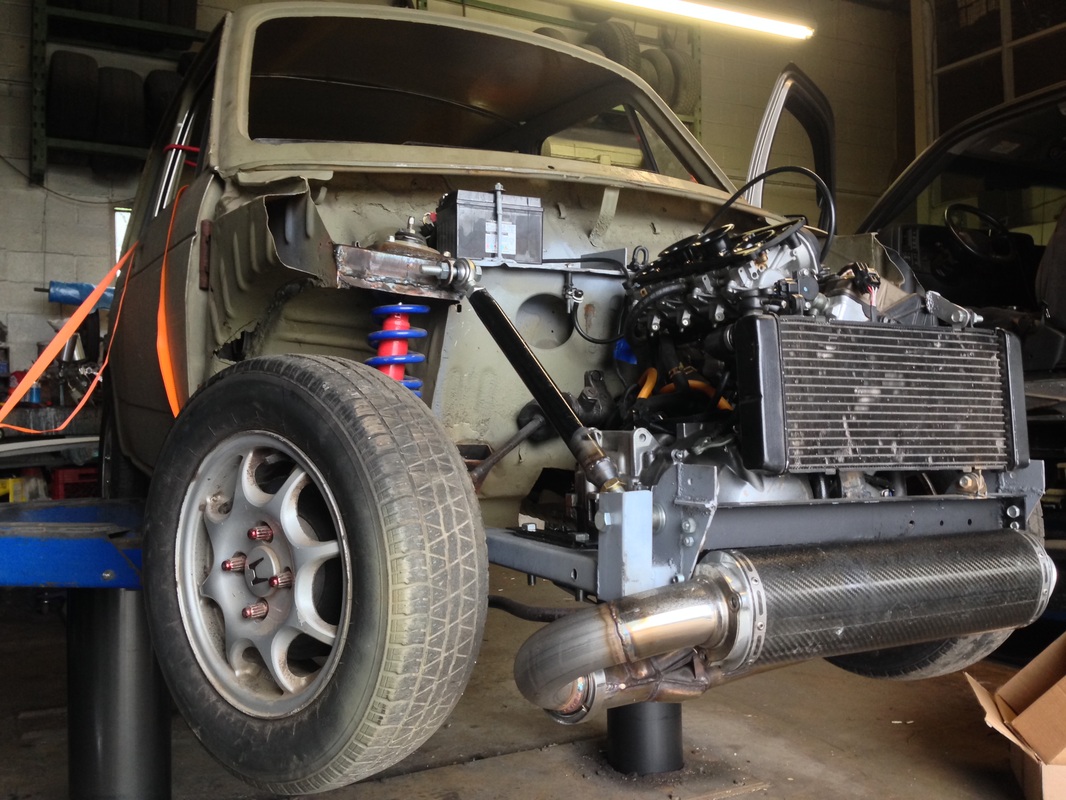
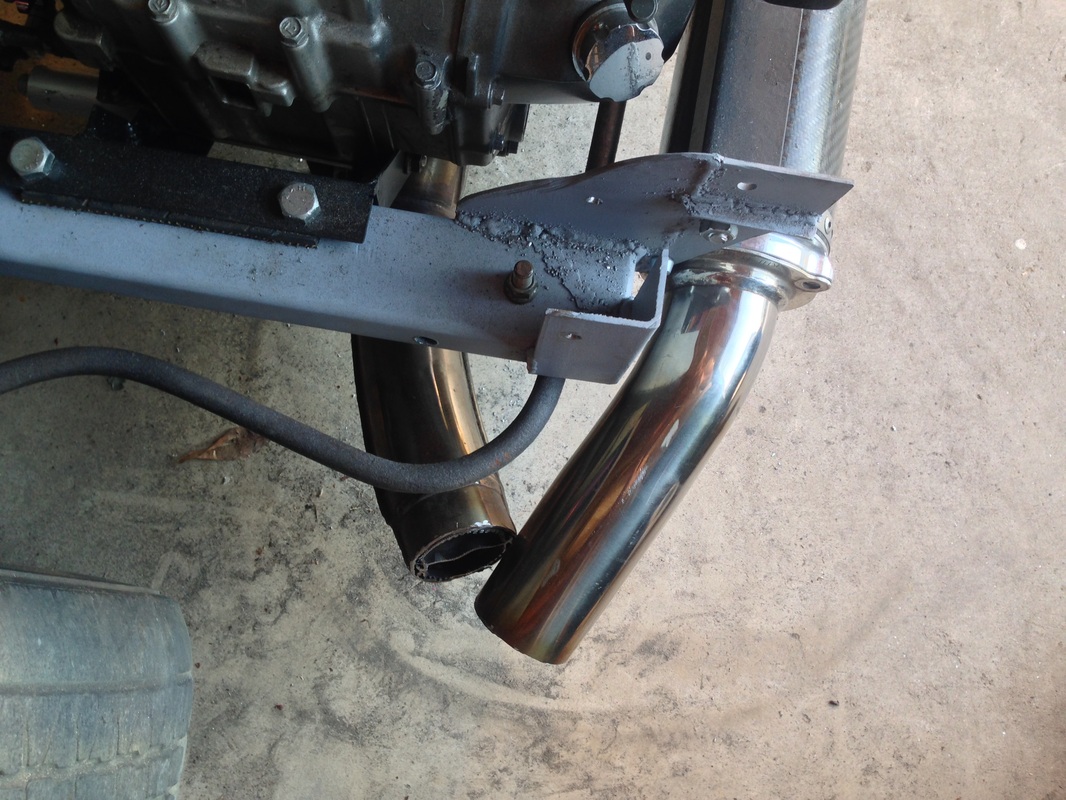
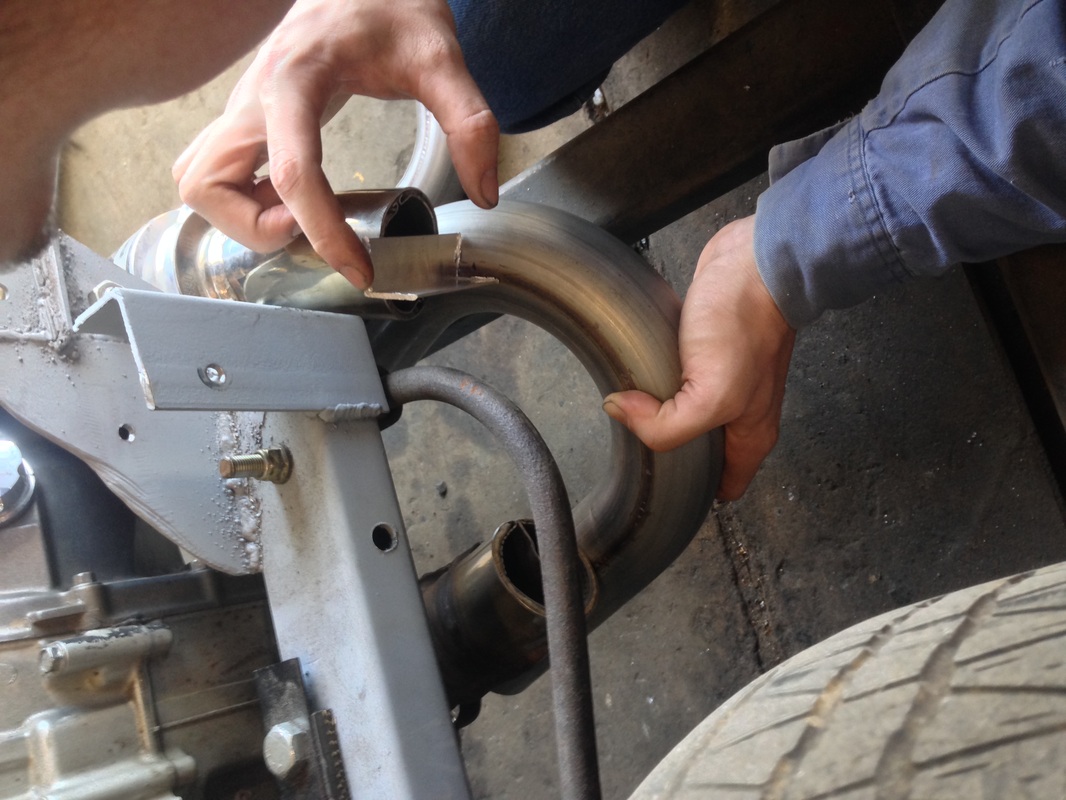
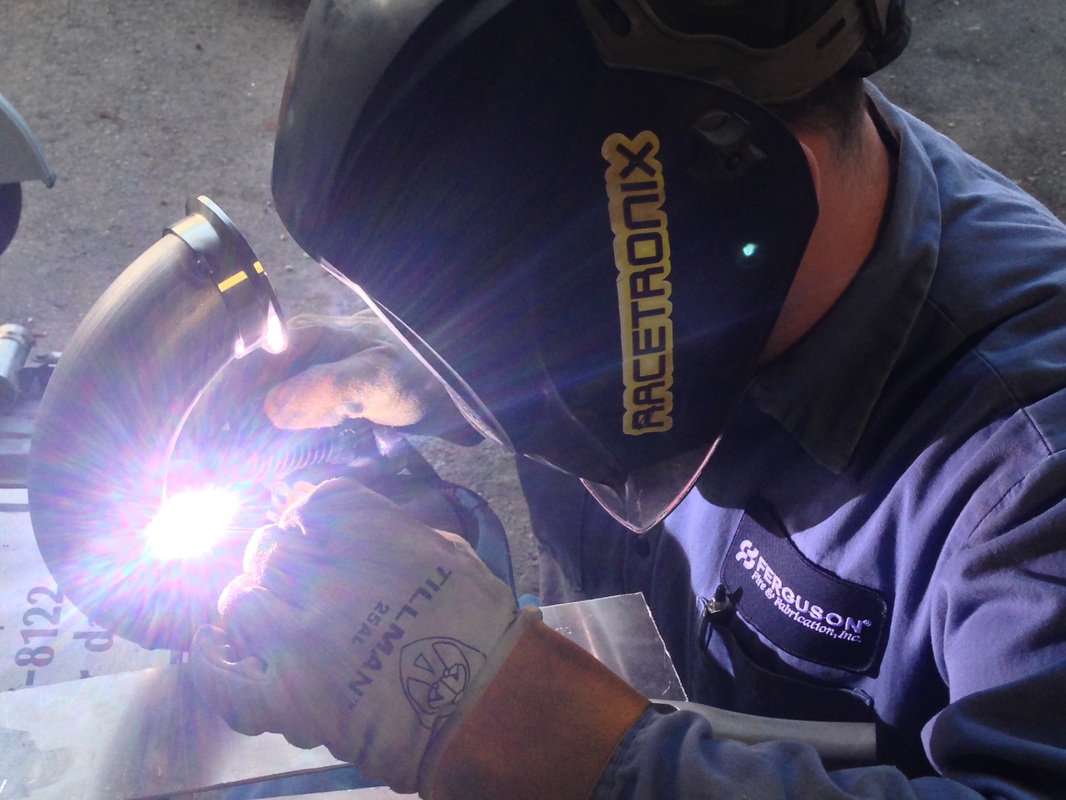
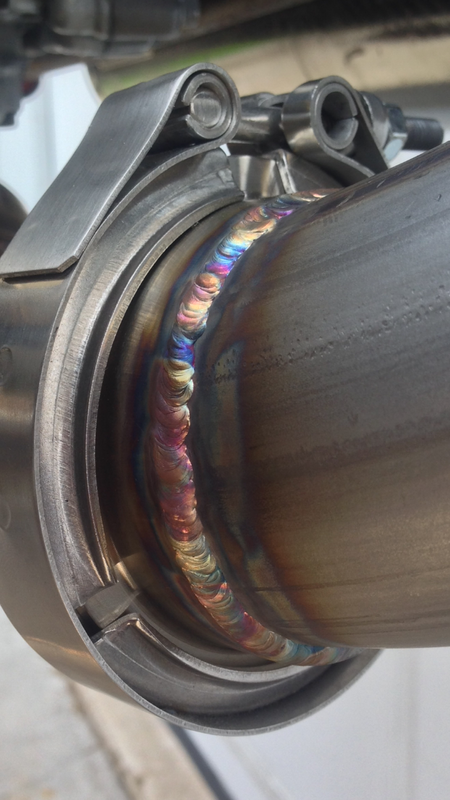
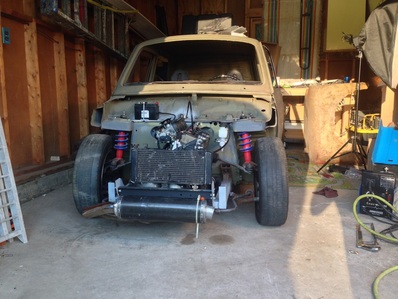 I didn't have many options as far as routing the exhaust goes. Space is quite limited if you try to route the exhaust towards the rear of the car, so the next best option was to run out the header, do a soft 180, and end with the muffler centered under/in front of the core support. The exhaust system is fully stainless, so I enlisted the help of my buddy rick, who brought his TIG setup over to help me out. Thanks Rick!
A little smoother of a start up video. The throttle cable is also now hooked to the gas pedal.
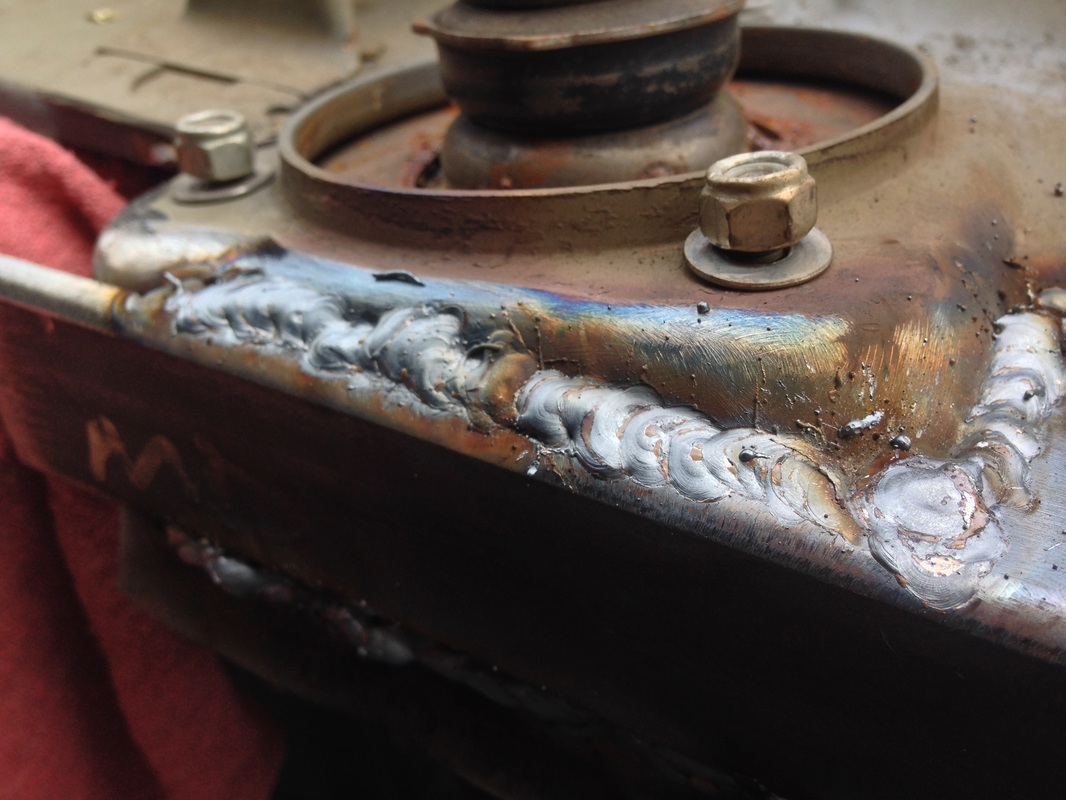
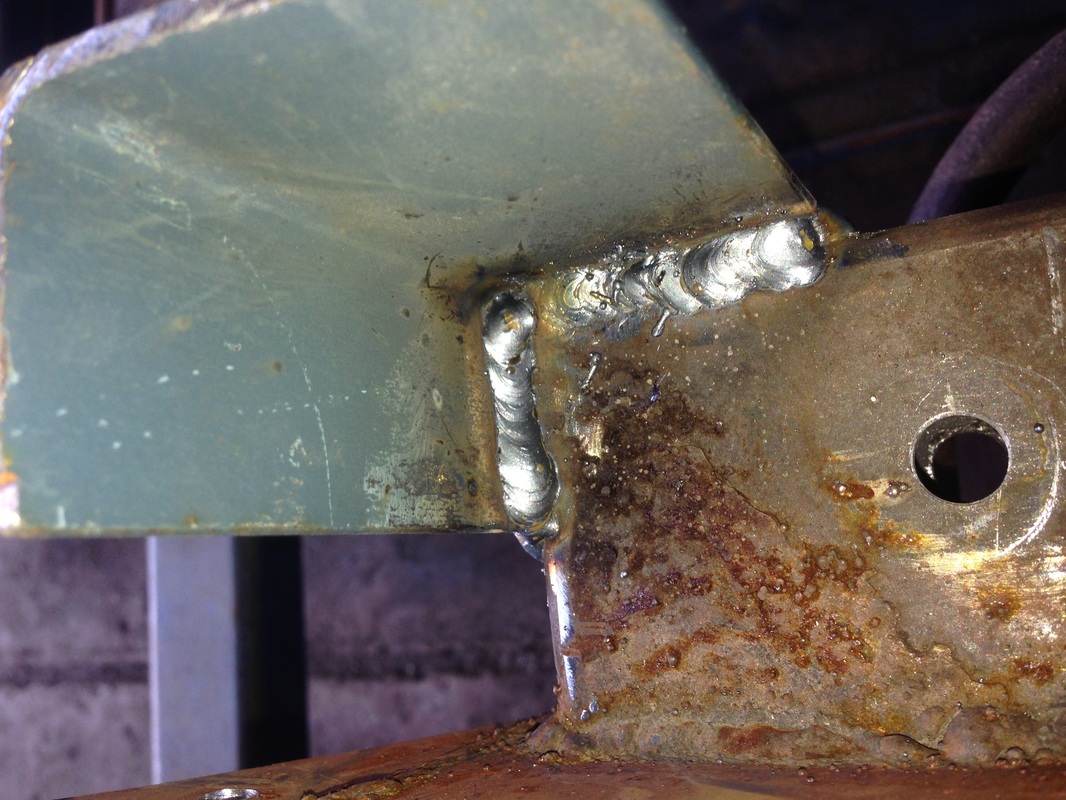
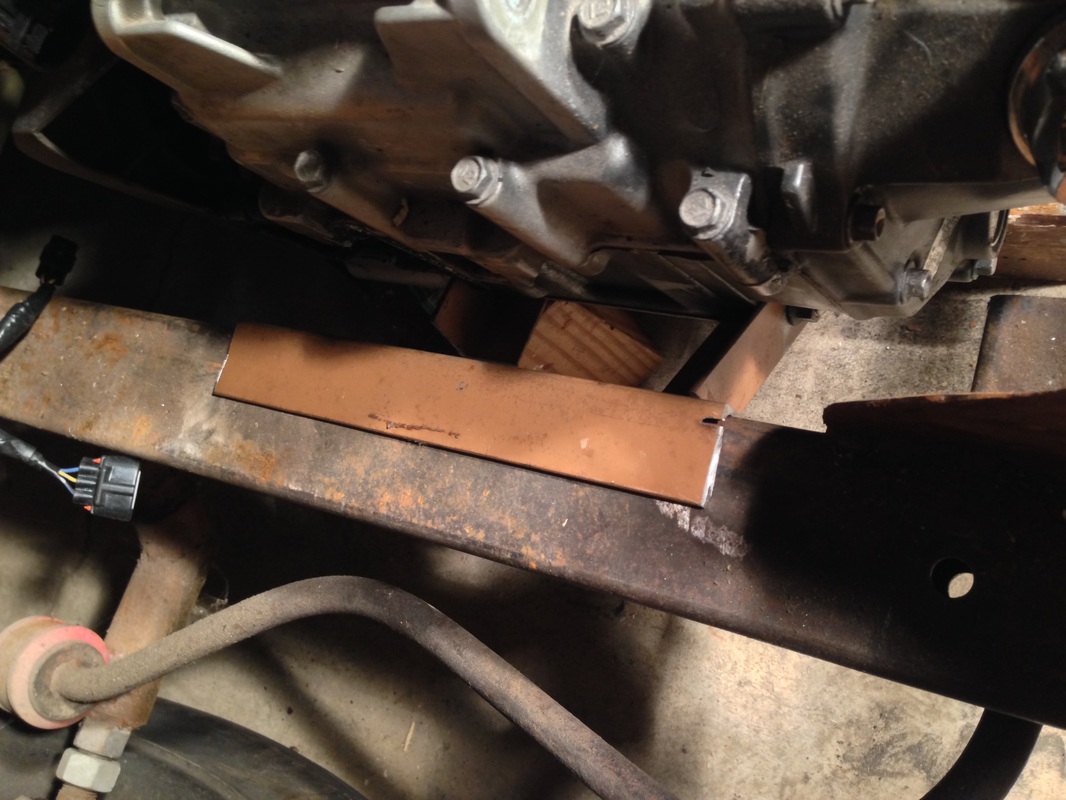
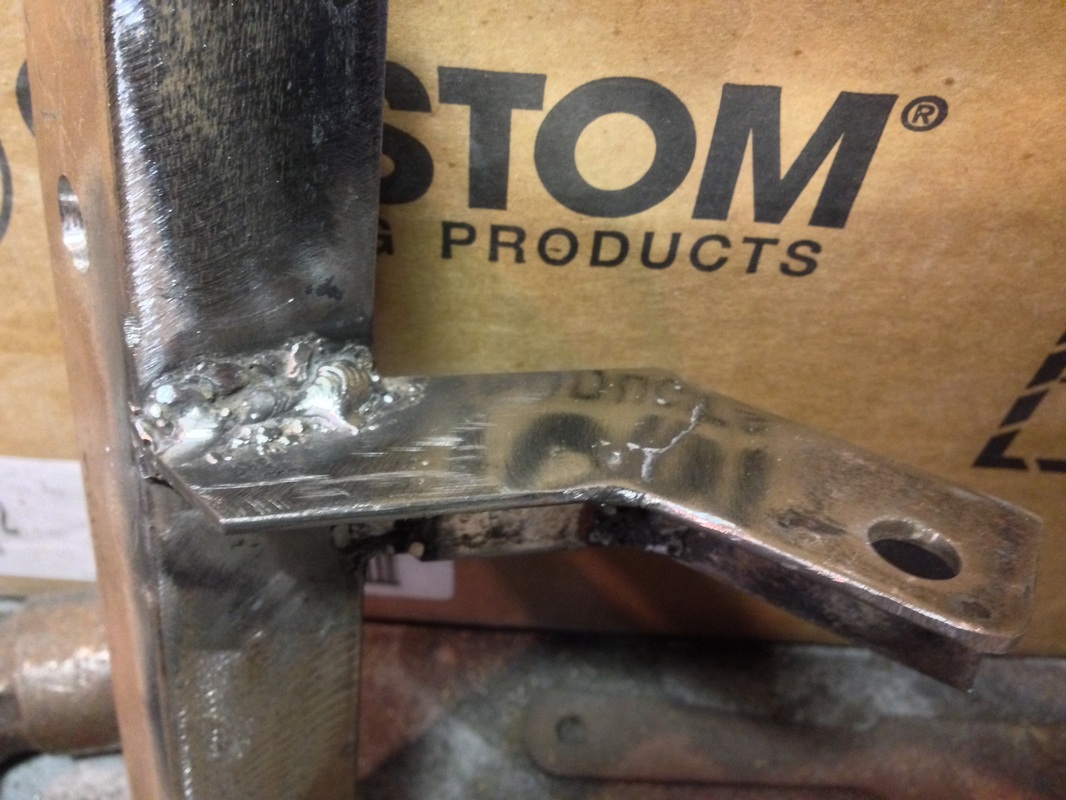
 Pulled the engine back out to use the welder at work and sure-up the mounts, also adding some boxed out areas in the front where I will be able to add heim joints in the future for subframe triangulation. 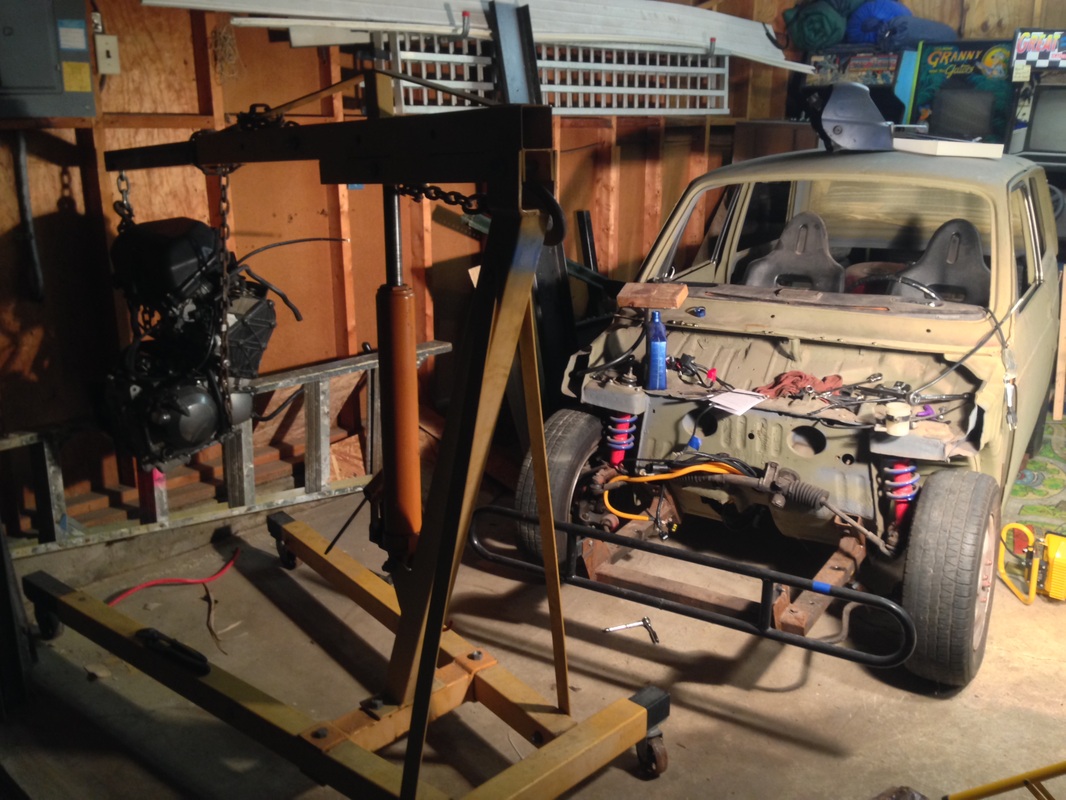
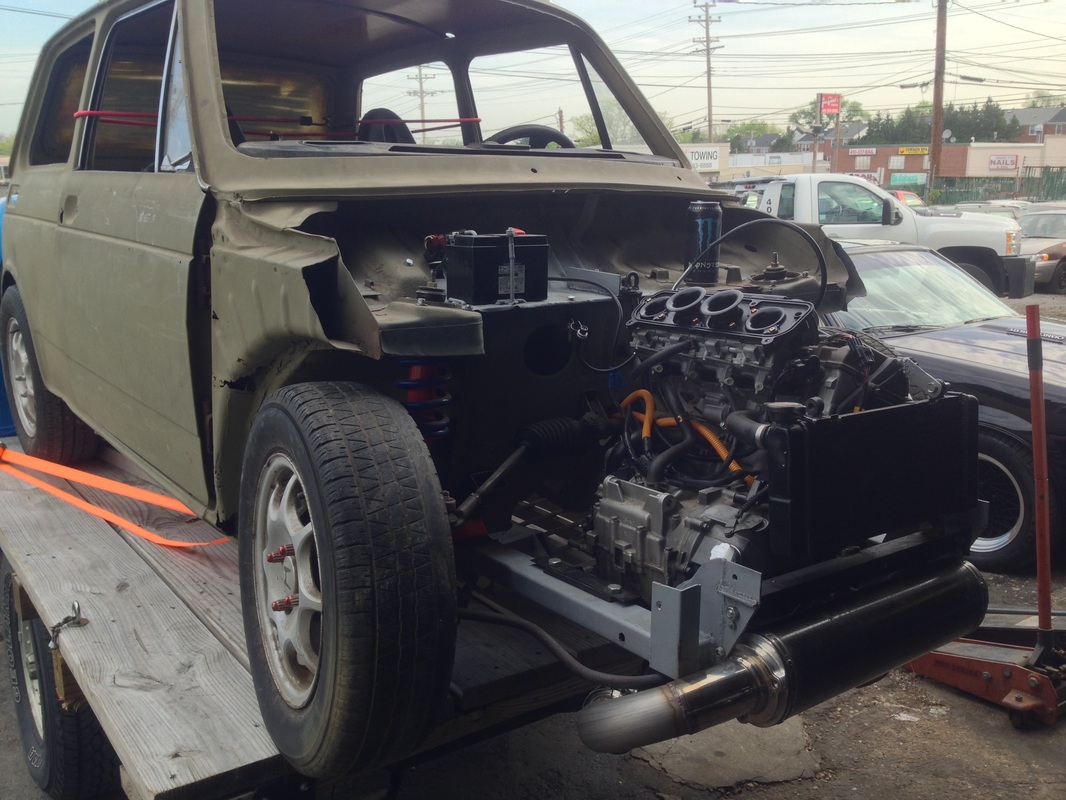
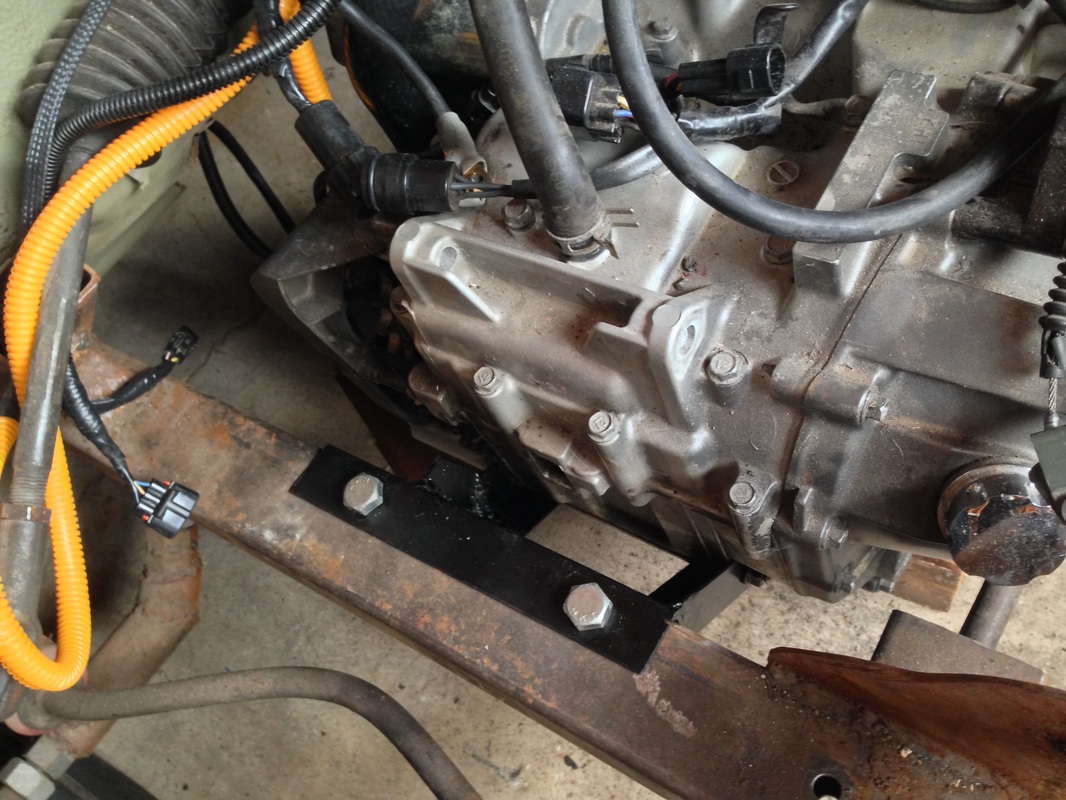
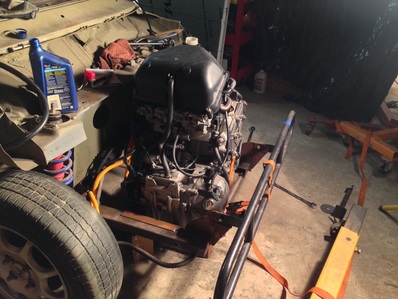 I was unhappy with the motor mounts I had done before, and after spending some time with the car, it was clear the engine/trans needed to sit lower in the subframe. I was previously restricted by the front rail, but after talking with andrew, it was decided it could be cut out as long as it was replaced by a bolt in "core support" and possible additional reinforcements. Once the front rail was cut, the motor easily slipped 3 inches lower. Perfect. Now I just needed to make the new mounts. 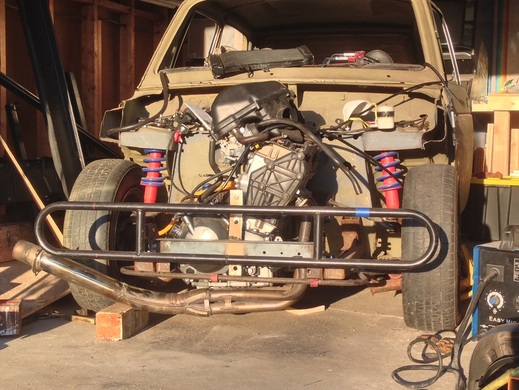 The motor is now completely secure in its new position. I will work on reinforcing some of the front end structure later, but this is much better for now, and should noticeably improve handling.
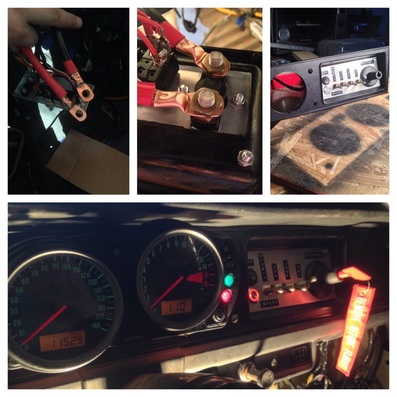 After searching around the garage for a bit for a suitably thick battery cable, I decided on cutting up a jumper cable and just using that. Salvo had some nice copper terminators, and so I got to wiring everything up. I also took the opportunity to throw a fresh coat of paint on the factory gauge bezel. I'm liking the look so far, we will just have to see how everything holds up! 
Its been especially cold in the garage and now there's a foot of snow outside, so I decided to do some of the wiring in the house. Can't wait to connect the harness and try it out! 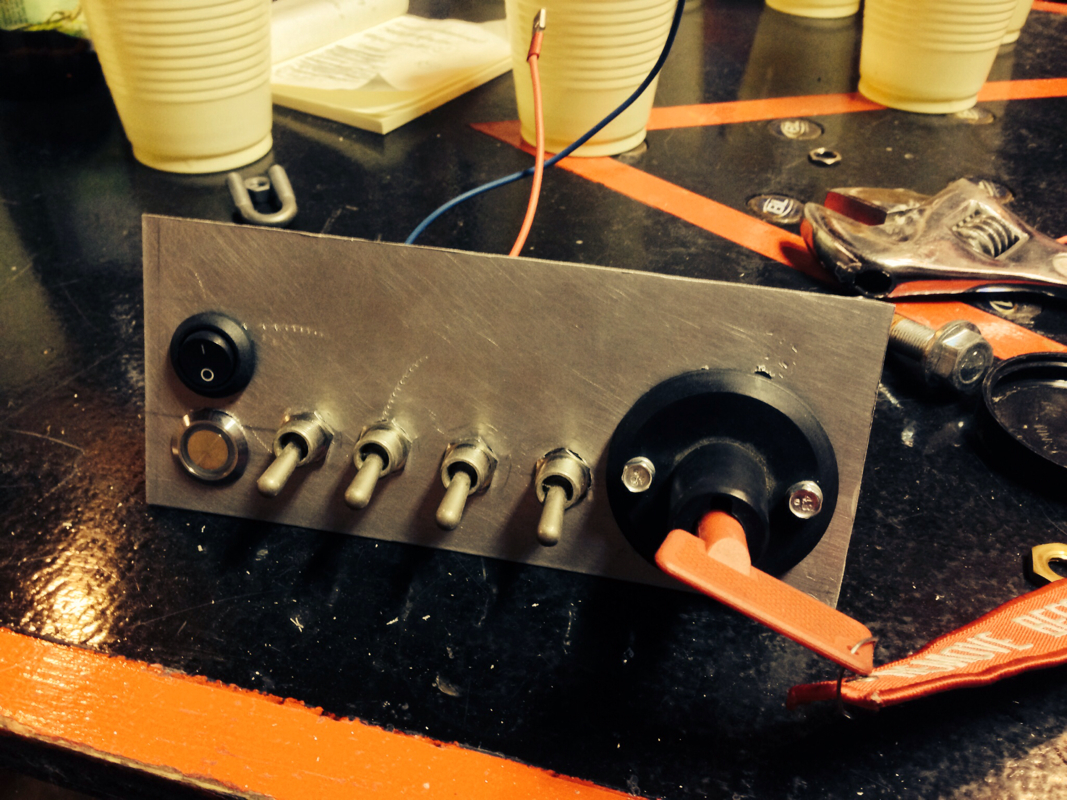
Only had 30 mins or so free today, but I did manage to get the rest of the switches in how I want them. 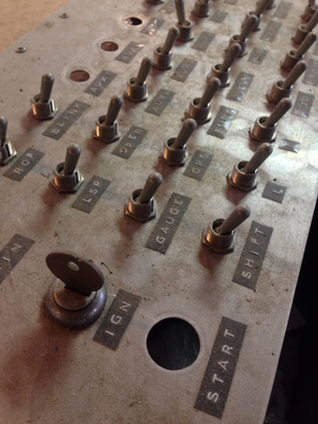 I've been waiting to re-purpose this old dashboard from my old 66 ford falcon. I was originally inspired by the no-frills design that I had seen on older rally cars and I really wanted to emulate that. Unfortunately, I never got a chance to use it in the falcon, and I ended up parting out the project. This dash board was one thing I knew I had to keep, and I wanted to allow it to live on in this project. 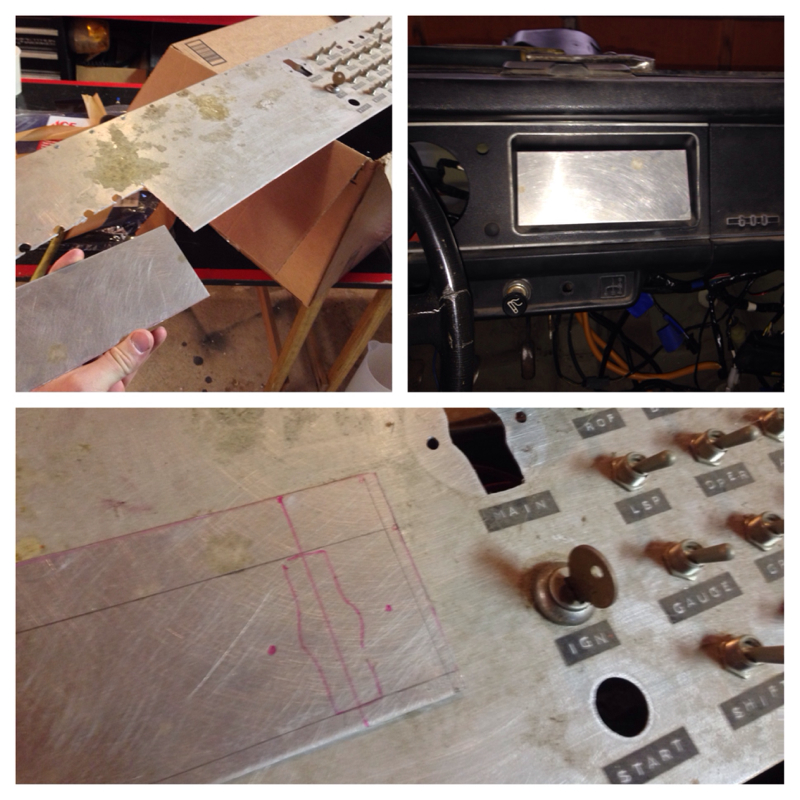 I cut out a clean section to fit into the radio area, hopefully this will hold the battery cutoff switch, ignition / fuel pump, electric fan, and start. If I have room I may add a switch for the headlights as well 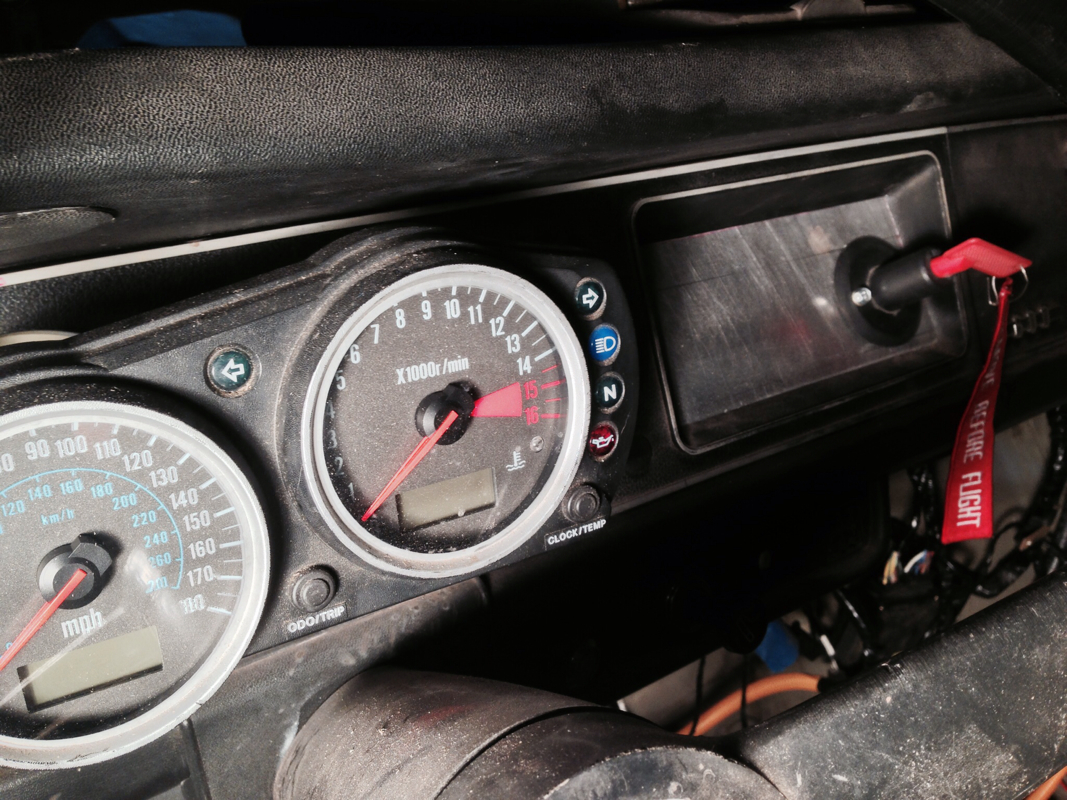 This is the official first start up with this motor. Unfortunately I was too excited to wait and let my phone charge, so the video just cuts off :/ But it does run! I promise! This is a great step moving forward. Now that I'm confident all the wiring is in order, I can begin to retrofit the controls into a more car-friendly orientation.
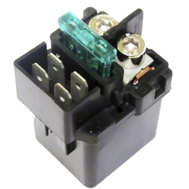 Well the no start issue is actually due to a faulty starter relay, which I'm pretty sure I broke by accident while rerouting some cables. I ordered a new one on amazon for $10 along with a super basic oil cooler. 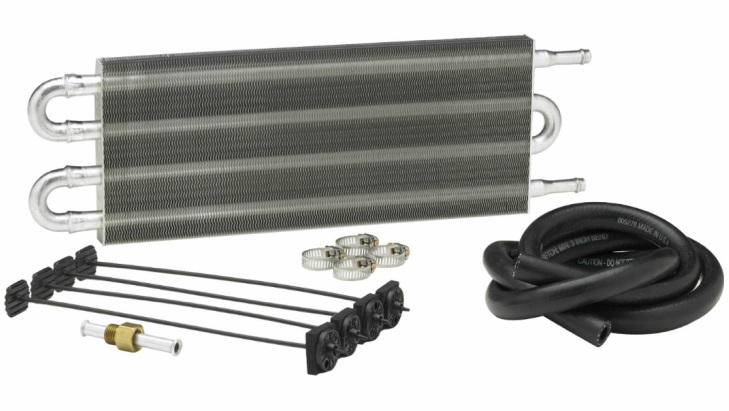 I believe this is the last absolutely crucial harness I have to extend for the motor to run. 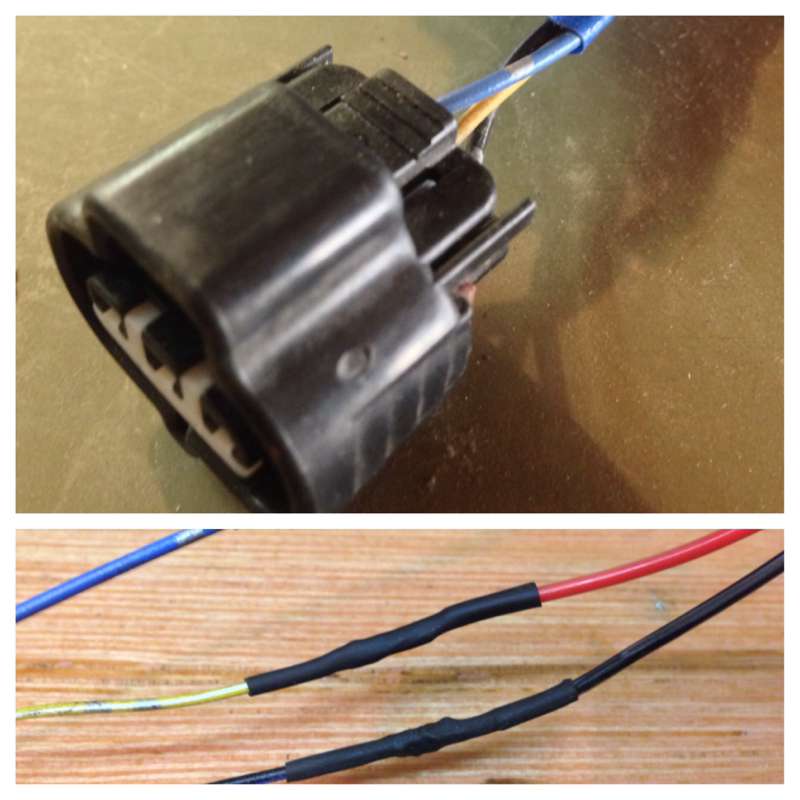
I tried to tap the starter, but the battery is to low, so I just get a click. I'll charge it overnight and hopefully give it a shot tomorrow! I extended the fuel pump harness and temporarily installed the original gas tank just at least until the point where I can get it to start. 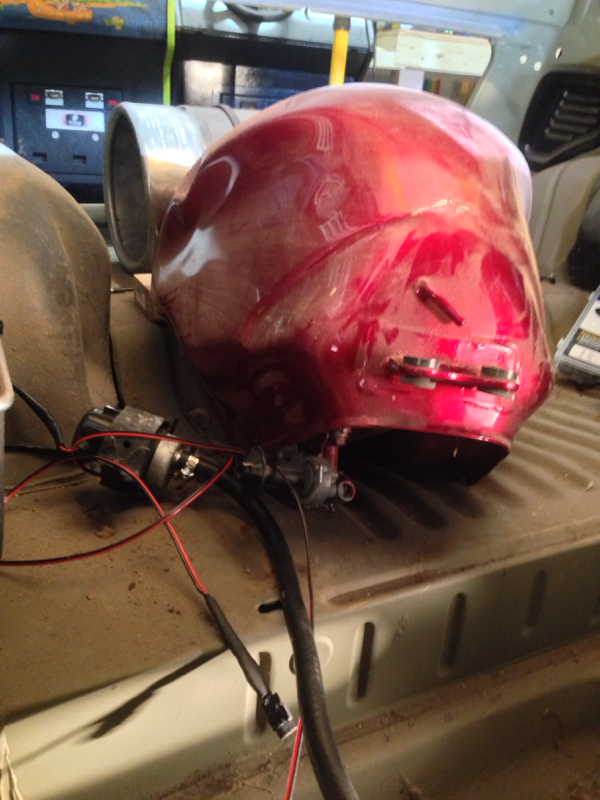
Once it's all set, I will be installing this nice aluminum fuel cell. Thanks Mike! 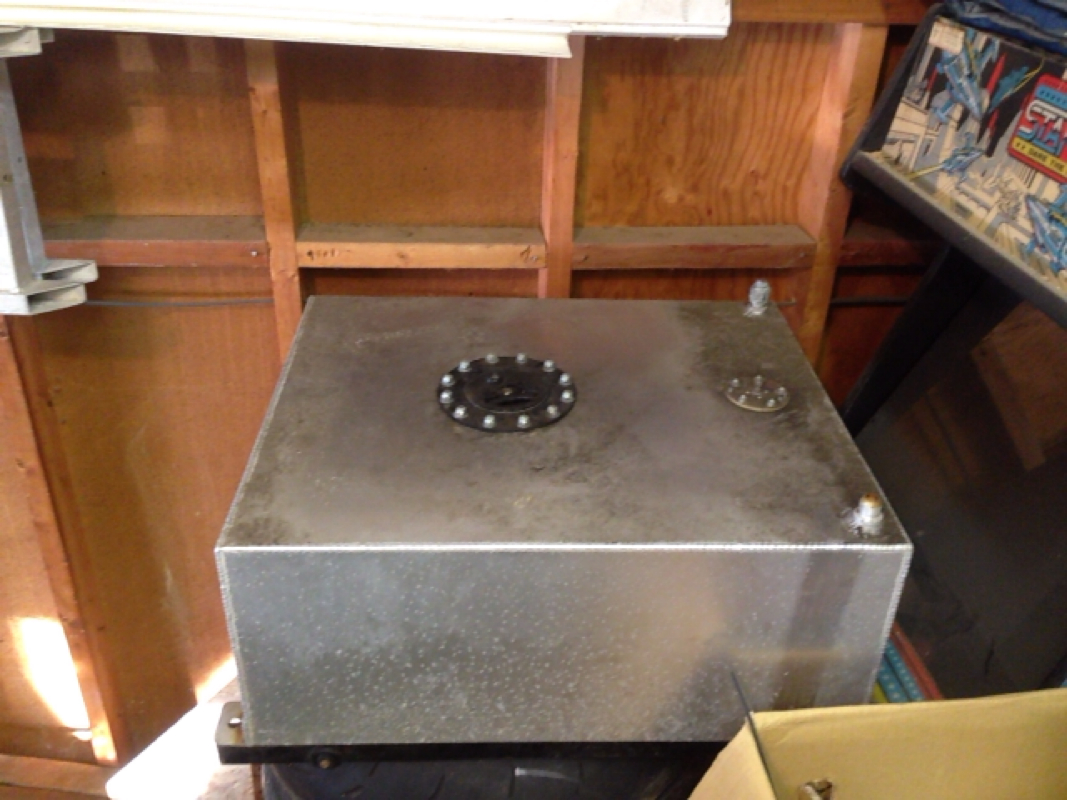
Extending 2 more harnesses. I decided to bypass the kickstand switch at the interior harness. If I decide to add a security feature later, this would be a good place to do it. 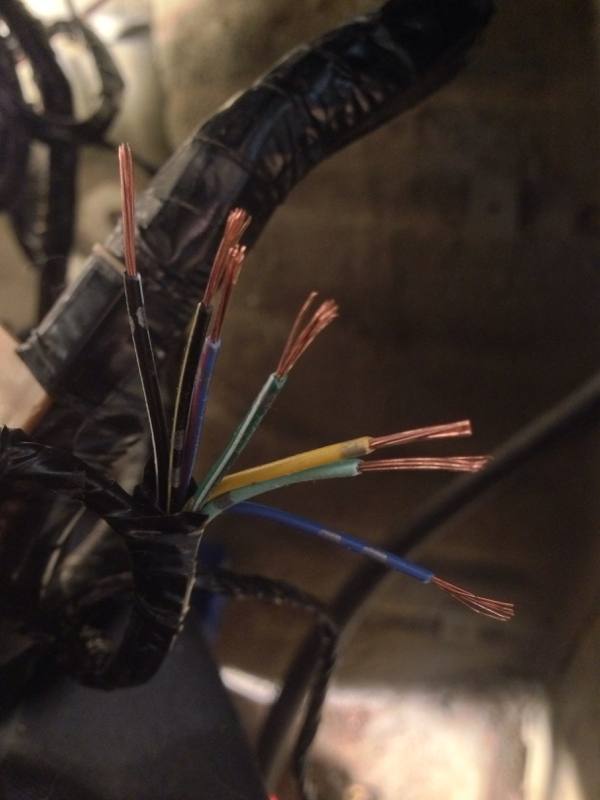
I forgot to label a few wires and unfortunately they're all black. Luckily I found a wiring diagram online which is proving to be a very valuable resource 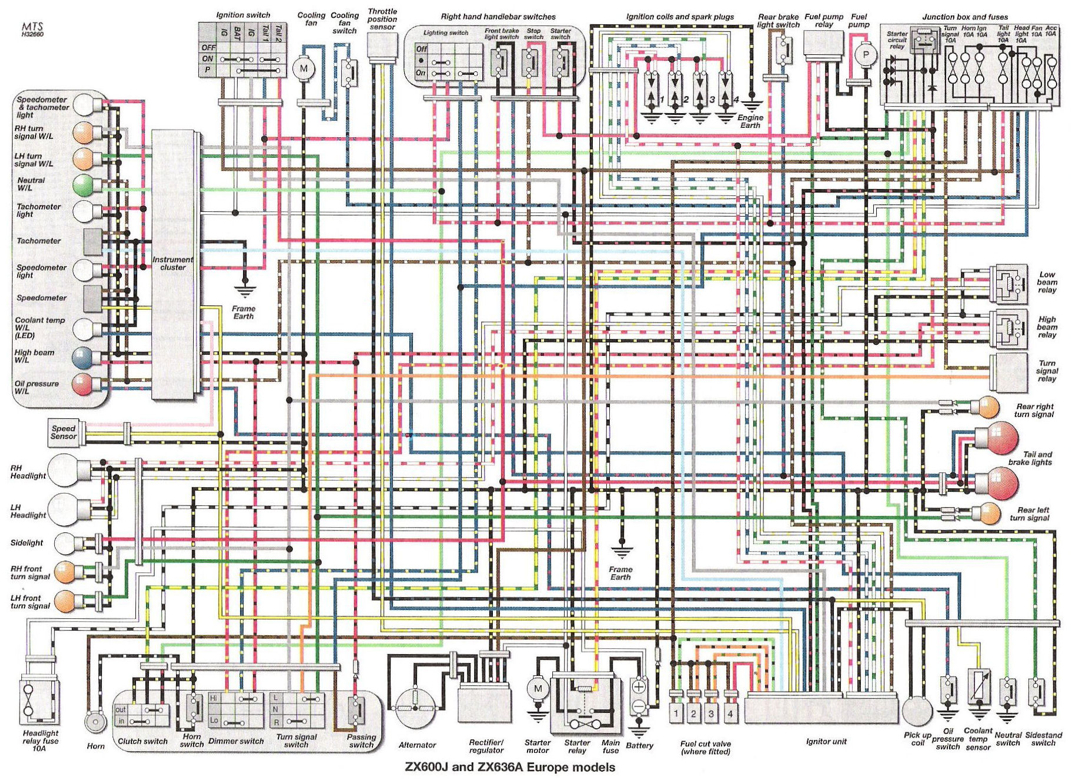
This harness is a simple 3 wire, so I was able to knock it out pretty quick 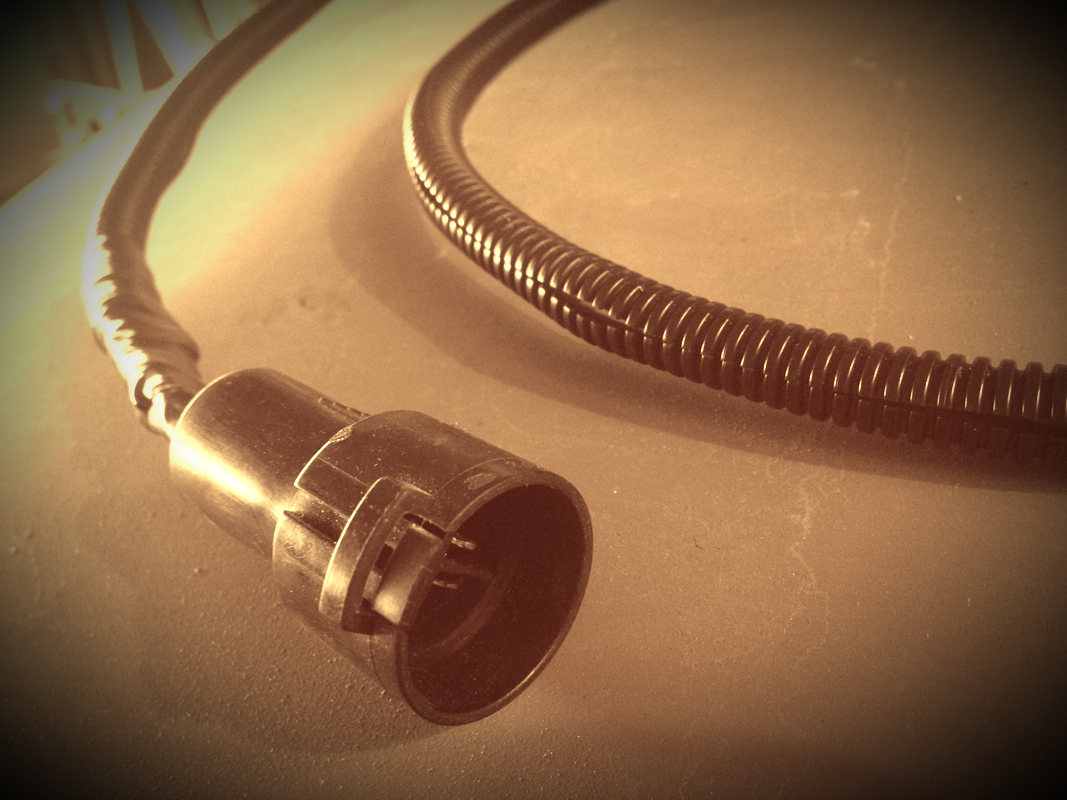
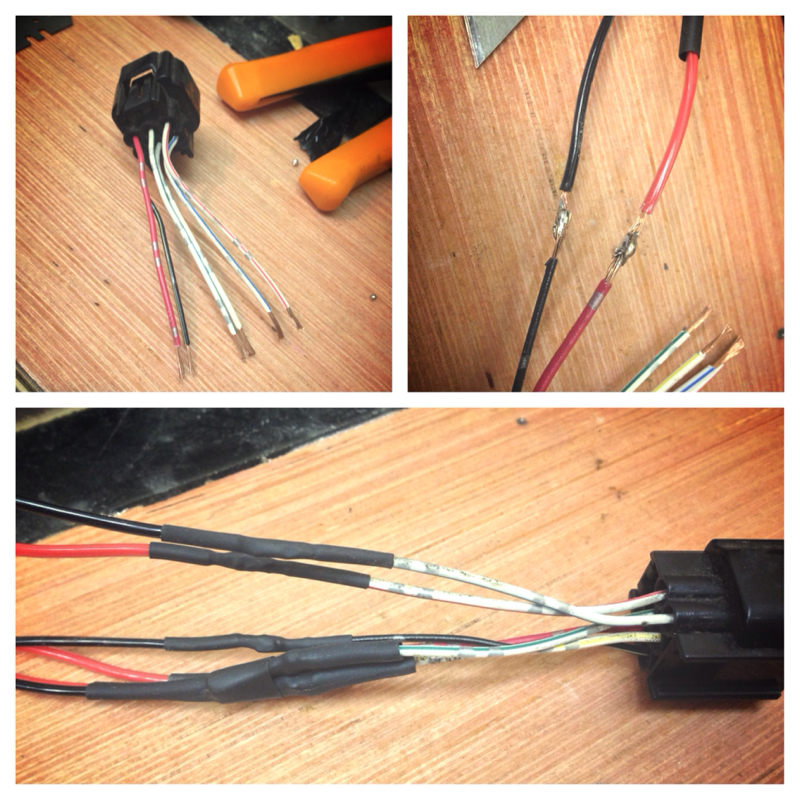
I'm starting to tackle some of the major wiring today. I figured the wiring loom to the coil packs would be as good a place as any to start. This harness had to be extended from its original 9" to about 42". 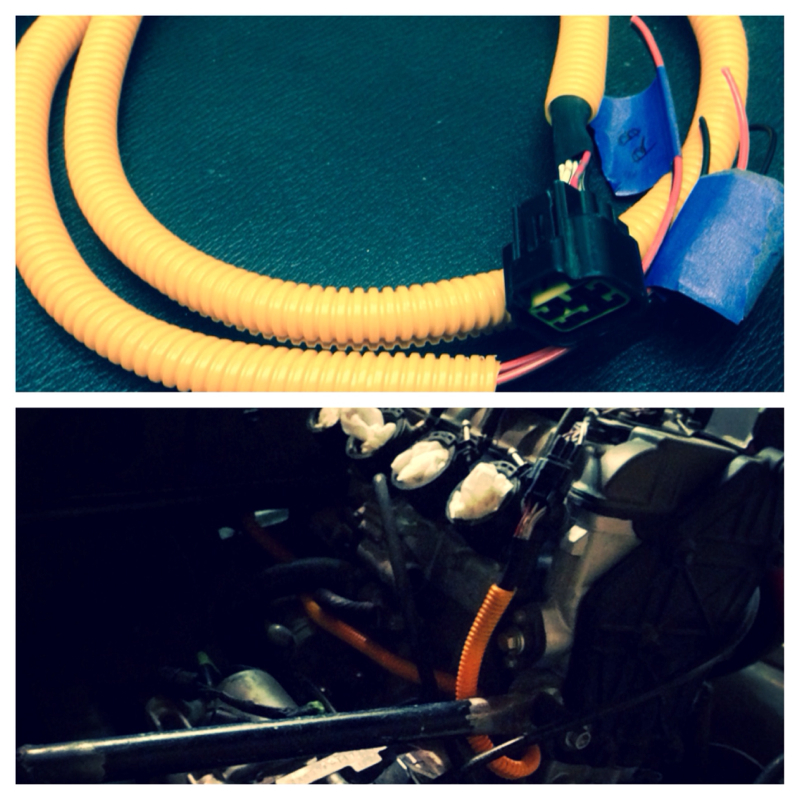
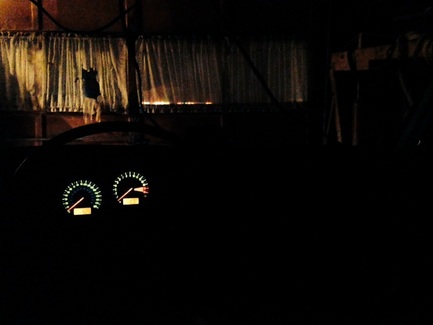 After connecting the battery, I turned the key, and to my delight, the gauge cluster turned on. I took a minute to sit down and soak it in. It really gave me the jump start I needed to get back in to this project and really make some progress. Now it's just the time consuming matter of extending the rest of the harness and testing to make sure every function works. 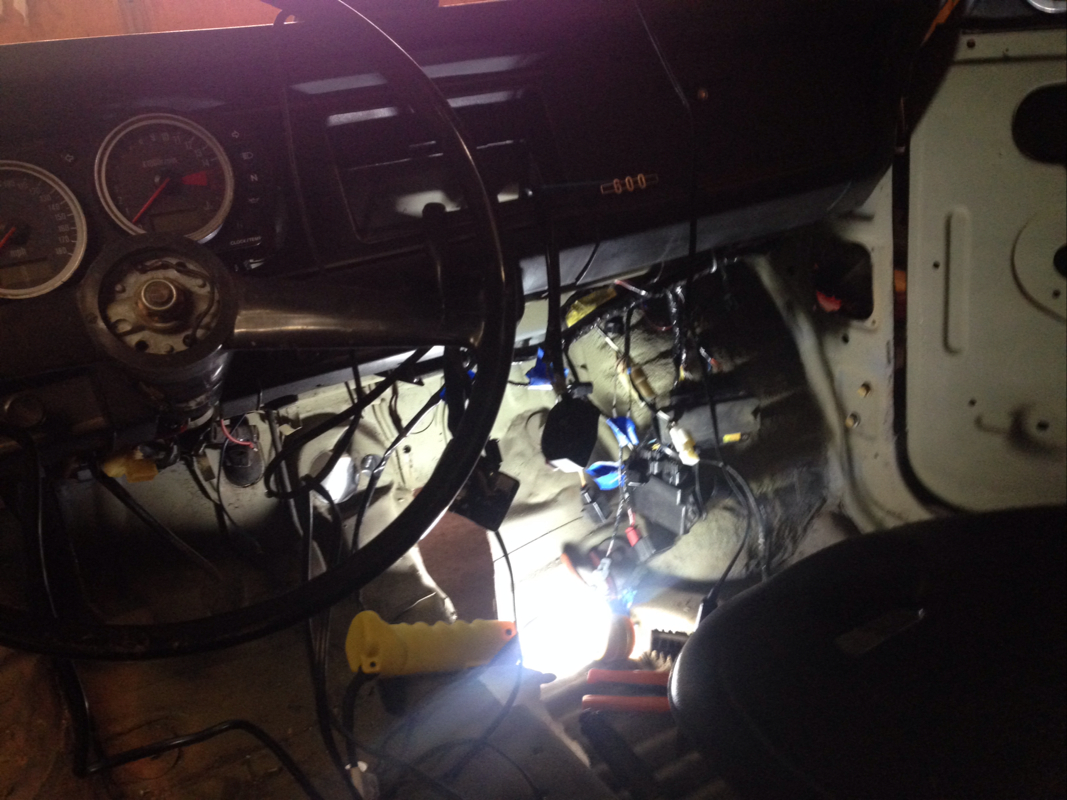 After studying the harness layout for a while, I decided it would be best to house the harness inside the dashboard and extend select wires to the engine components versus having the harness wrapped around the engine and extending ignition controls and speedometer/rpm signals inside the cabin. This should also give me a nice clean look in the engine bay. 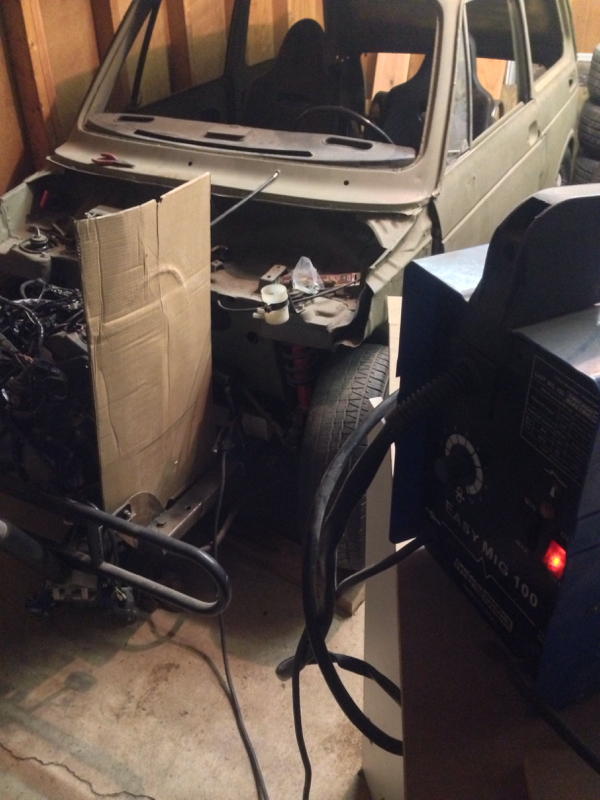 With the motor in place, I began making some crude motor mounts. I used whatever metal I had laying around (chin up bar, old bed frame, jack handle). I'll have to see how they hold up, but I figured I could easily redesign later or perhaps just reinforce these and clean them up a bit. | ArchivesDecember 2013 Categories |

 RSS Feed